 Funky Millions
What Is Draping in Makeup? The 90s Blush Technique Explained
Learn what draping in makeup means, how this 90s blush and bronzer technique creates sculpted definition, and how to do it step by step.
Quick summary
Key Takeaways
- Draping sweeps blush from the cheek toward the temple in a continuous motion, creating sculpted dimension rather than a simple, localized flush of color.
- Draping originated in 1990s glamour makeup and has experienced a significant contemporary revival driven by renewed interest in that era's aesthetic.
- The continuous, sweeping application from cheek to temple, rather than a small, localized dabbing motion, is the defining technique behind effective draping.
- Choose a slightly less saturated blush shade for draping than you would for standard application, since the larger coverage area increases overall color intensity.
- Powder blush offers more forgiving, correctable application for draping beginners, while cream blush rewards more practiced technique with a seamless finish, and layering both can produce the most dramatic, long-lasting result for special occasions.
- Draping's dramatic, sweeping application translates particularly well to photography, partly explaining both its historical popularity in fashion contexts and its modern social media revival, and its in-person intensity often reads as more balanced once captured on camera.
- Achieving a well-defined drape effect requires adjusting shade intensity and undertone to your specific skin tone, with deeper skin tones generally needing richer, more saturated shades to achieve the same visible definition that cooler, lighter shades provide on fairer skin.
Draping, a makeup technique with roots in 1990s glamour, has resurfaced as a favorite among makeup artists for creating sculpted, dimensional cheek color that goes well beyond a simple dot of blush on the apples of the cheeks. This guide explains exactly what draping involves, why it works, and how to recreate the technique step by step.
What Is Draping in Makeup?
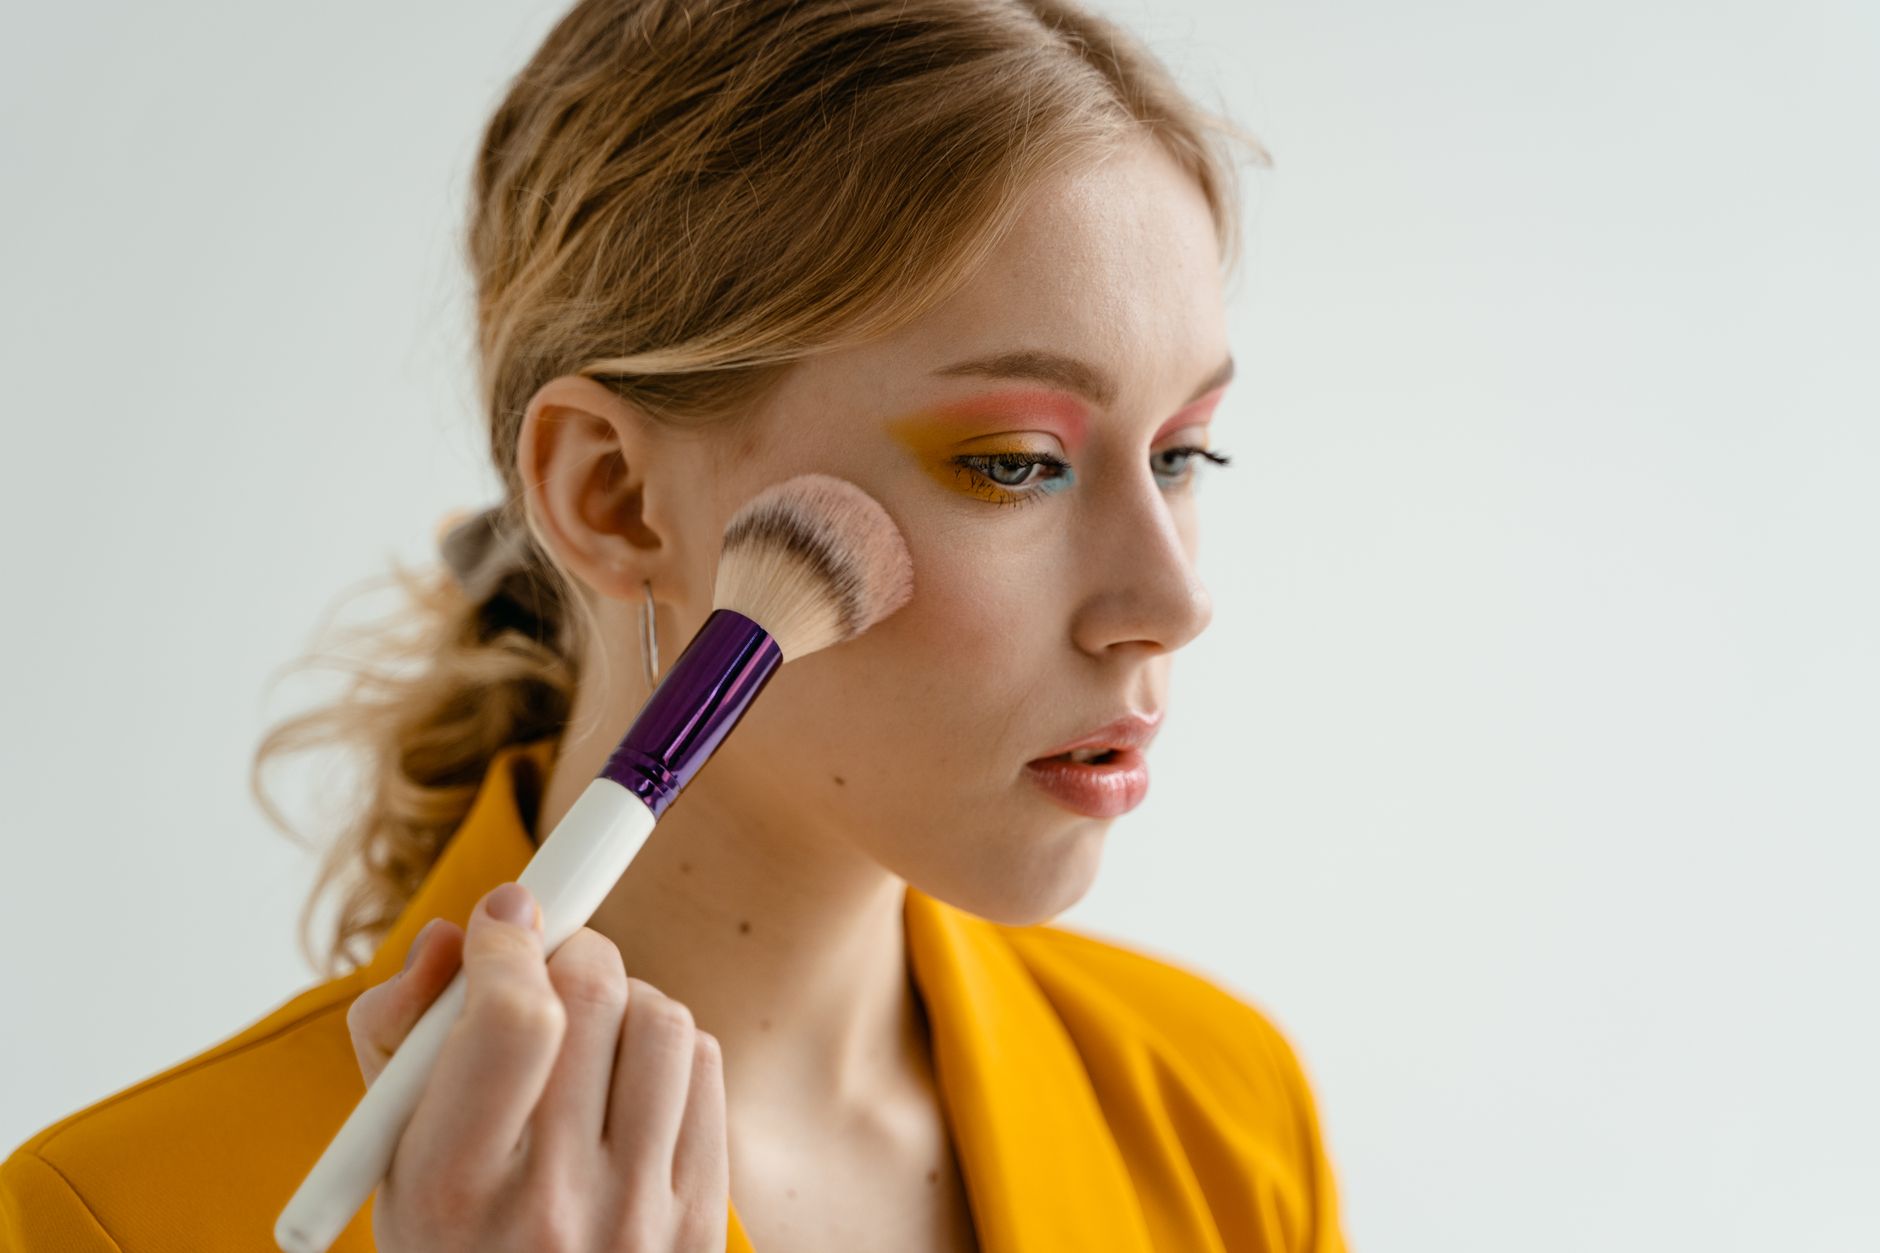
Draping is a technique that applies blush (and sometimes bronzer or contour) in a continuous, sweeping motion from the cheek up toward the temple and along the upper cheekbone, creating a more sculpted, dimensional effect than a simple, contained application to just the apples of the cheeks. The technique essentially treats color placement as a tool for reshaping the face's visual structure, not just adding a flush of color.
The History of the Draping Technique
Draping is closely associated with 1990s supermodel makeup and the work of specific influential makeup artists of that era, who used the technique to create the era's signature sculpted, glamorous cheekbone definition. After falling somewhat out of mainstream use in subsequent decades, draping experienced a significant revival in the 2020s, driven by renewed interest in 90s aesthetics and makeup artists reintroducing the technique to broader audiences through social media tutorials.
How Draping Differs From Regular Blush Application
| Feature | Draping | Standard Blush Application |
|---|---|---|
| Placement | Cheek to temple, continuous sweep | Contained to the apples of the cheeks |
| Goal | Sculpting and dimension | Simple color flush |
| Product amount | More generous, blended coverage | Typically lighter, more localized |
| Skill level | Intermediate to advanced | Beginner-friendly |
| Visual effect | Lifted, sculpted cheekbones | Youthful, simple flush |
What You Need for Draping
- A fluffy, angled blush brush for the sweeping motion the technique requires
- Cream or powder blush, chosen based on desired finish
- Bronzer (optional), often used alongside blush for added dimension
- A complementary highlighter (optional), to enhance the sculpted effect
How to Drape: Step-by-Step
Step 1: Identify Your Placement Line
Locate the area from the apple of your cheek up toward your temple, roughly following the top of your cheekbone.
Step 2: Load Your Brush
Tap your angled brush into your chosen blush, tapping off excess to avoid overapplication.
Step 3: Sweep in One Continuous Motion
Starting at the apple of the cheek, sweep the brush up and outward toward the temple in one fluid motion, rather than a small, contained circular motion.
Step 4: Blend the Edges
Use a clean brush to soften and blend the upper and lower edges of the drape, avoiding any harsh lines.
Step 5: Layer for Intensity (Optional)
Build up color gradually with additional passes if you want a more intense, defined effect.
Draping by Face Shape
| Face Shape | Draping Adjustment |
|---|---|
| Round | Sweep more toward the temple to add length and lift |
| Square | Focus on the cheekbone area to soften angles |
| Heart | Blend down slightly to balance a narrower chin |
| Oval | Most placements work well given balanced proportions |
| Long | Keep the drape more horizontal to avoid further elongating the face |
Color Selection for Draping
Since draping covers a larger area than standard blush application, color choice matters significantly to avoid an overly intense or unnatural effect. Many makeup artists recommend choosing a shade slightly less saturated than what you might use for standard, contained blush application, since the larger coverage area will still read as vibrant even with a slightly softer color.
Comparison Table: Draping vs. Standard Blush
| Consideration | Draping | Standard Blush |
|---|---|---|
| Time investment | Higher | Lower |
| Precision required | Higher | Lower |
| Visual impact | Dramatic, sculpted | Subtle, natural |
| Best for | Special occasions, photography, dramatic looks | Everyday makeup |
| Product formula | Works with cream or powder | Works with cream or powder |
Draping With Cream vs. Powder Formulas
The choice between cream and powder formulas, discussed more generally in our dedicated blush comparison guide, has specific implications for draping given the technique's larger coverage area and reliance on precise, controlled application.
Powder blush tends to be somewhat more forgiving for draping, particularly for beginners, since its buildable nature allows for easier correction if the initial sweep goes slightly too intense or slightly off-placement, simply by blending further or adding a translucent powder to soften the effect. Cream blush, while capable of producing a particularly seamless, skin-like drape once mastered, sets more quickly and offers less room for correction mid-application, making it a better choice for those who have already practiced and refined their technique with powder first.
For those wanting the most dramatic, photography-ready drape effect, layering cream blush first for a natural base flush, then powder blush swept in the same continuous drape motion on top, can combine cream's seamless blend with powder's buildable definition, producing a particularly long-lasting and visually striking result for special occasions specifically built around this more elaborate technique.
Modern Variations of Draping
Contemporary makeup artists have adapted draping for more everyday wearability, often using a softer touch and blending more seamlessly than the more dramatic, defined versions associated with its 90s origins. Some modern variations also incorporate multiple shades, a warmer bronzer at the base of the drape transitioning into a cooler blush toward the top, for added dimension beyond a single-color application.
Draping and Photography: Why the Technique Translates So Well on Camera
Draping's dramatic revival owes a great deal to how effectively the technique reads in photographs, a quality worth understanding since it explains both the technique's original popularity in the fashion and modeling world and its more recent resurgence through social media, both fundamentally photography-driven contexts.
Standard, contained blush application, while flattering in person, can sometimes read as flat or insufficiently defined under camera flash and studio lighting, since photography tends to compress the visual dimension that natural, ambient lighting provides to the face. Draping's continuous sweep from cheek to temple creates a more pronounced, deliberate shadow-and-highlight interplay that survives the flattening effect of photography considerably better than a small, contained dot of color, which is precisely why fashion and beauty photographers have long favored the technique for editorial and runway makeup.
This photography-friendly quality is also why draping tends to feel like "a lot" when viewed up close in a mirror under normal lighting, the same intensity that looks dramatic in person often translates to a much more balanced, appropriately defined result once captured on camera, a disconnect worth anticipating before assuming the technique has been overapplied simply because it looks bold in the mirror.
Common Mistakes to Avoid
Applying Draping With a Small, Circular Motion
This defeats the purpose of the technique, which relies specifically on a continuous, sweeping motion from cheek to temple rather than a contained, dabbing application.
Choosing a Color Too Intense for the Larger Coverage Area
Since draping covers more surface area than standard blush, using your typical blush shade at typical intensity can result in an overly saturated, unnatural look.
Not Blending the Edges Thoroughly
Harsh, unblended edges are particularly noticeable with draping's larger coverage area, making thorough blending especially important for a natural-looking result.
Skipping Face Shape Considerations
Applying an identical drape placement regardless of face shape can either enhance or work against your natural facial structure, depending on the match.
Draping Across Different Skin Tones
The visual impact of draping, and which specific blush and bronzer shades read most effectively for the technique, varies meaningfully across skin tones, an important consideration since much of the technique's original popularization featured a narrower range of skin tones than modern makeup content typically represents.
On fairer skin tones, cooler-toned pinks and berries tend to create the most visible, defined drape effect, since these shades contrast noticeably against lighter skin, making the sweeping, sculpting motion clearly visible even with relatively sheer application. On deeper skin tones, achieving a similarly visible drape effect often requires richer, more saturated shades, such as deep berries, warm terracottas, or rich corals, since lighter or more sheer formulas can be less visually distinct against deeper skin without building up more product than the technique typically calls for.
For medium skin tones, warm bronzers combined with a complementary blush shade in the drape often produce a particularly striking, dimensional result, since this combination tends to enhance rather than compete with the skin's natural warmth. Regardless of skin tone, testing the chosen shade's visibility and blendability on your jawline before committing to a full drape application helps avoid discovering partway through that a shade is either too subtle or too intense for the desired effect.
- Use a fluffy, angled brush specifically suited to the sweeping motion the technique requires.
- Start with less product and build up gradually, since draping's larger coverage area intensifies color more than expected.
- Adjust placement based on your face shape rather than applying a universal template.
- Blend thoroughly at both the upper and lower edges of the drape for a seamless, professional-looking result.
Conclusion
Draping offers a striking, sculpted alternative to standard blush application, using a continuous sweeping motion from cheek to temple to create the dimensional, lifted cheekbone effect popularized in 1990s glamour makeup. While it requires more skill and precision than a simple dot of blush, understanding the correct technique, appropriate color selection, and face-shape-specific placement can help you successfully recreate this striking look for special occasions or, with a softer touch, everyday wear.
For more on complementary cheek makeup techniques, see our guide on cream blush vs. powder blush.
Category: Makeup
Tags: draping technique, blush application, 90s makeup, contour and blush, sculpted makeup, makeup history, cheekbone definition, makeup techniques, glamour makeup, blush placement
Frequently Asked Questions
References
Last updated
This article is for informational purposes only and does not constitute medical advice. Consult a licensed dermatologist or healthcare provider before starting any new treatment.
Beauty & Hair Care Editor
Amanda Gurton is a beauty editor and researcher with a focus on translating dermatology and trichology insights into clear, actionable advice. She covers skincare routines, hair health, ingredient science, and everyday beauty habits.
Comments (0)
Be the first to comment.
Related Articles
Makeup Mistakes That Age Mature Skin (and What to Do Instead)
Discover common makeup mistakes that can age mature skin, from wrong product textures to outdated techniques, and learn what to do instead.
Makeup Tips for Glasses Wearers
Learn makeup techniques specifically for glasses wearers, from eyeshadow adjustments to brow shaping, for a look that works with your frames.
Best Eyeliner Styles for Different Eye Shapes
Discover the best eyeliner styles for your specific eye shape, from hooded to almond to monolid, with step-by-step application tips.
Cream Blush vs. Powder Blush: Which Is Right for Your Skin?
Cream blush vs powder blush: compare finish, longevity, and application for each formula, and learn which suits your skin type best.